Install your SSL Certificate on Microsoft Exchange 2013
Install your SSL Certificate on Microsoft Exchange 2013

Please follow these instructions to install your SSL certificate on Microsoft Exchange 2013.
Using the Exchange Management Console
- Copy your example_domain_name.cer file to the network share folder of your Exchange server. This should be where you saved the CSR
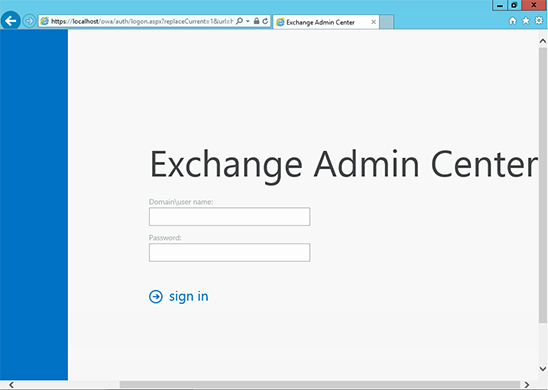
- Visit https://localhost/ecp in your browser to access the Exchange Admin Centre
- Enter your details to login
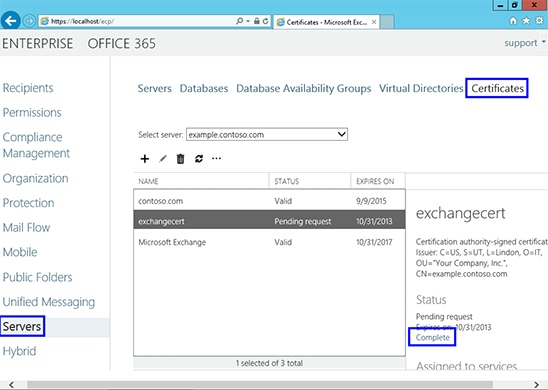
- Follow the Servers link in the left column, then, on your right, click on Certificates
- From the menu select your certificate from its friendly name, then click Complete to the right of the menu
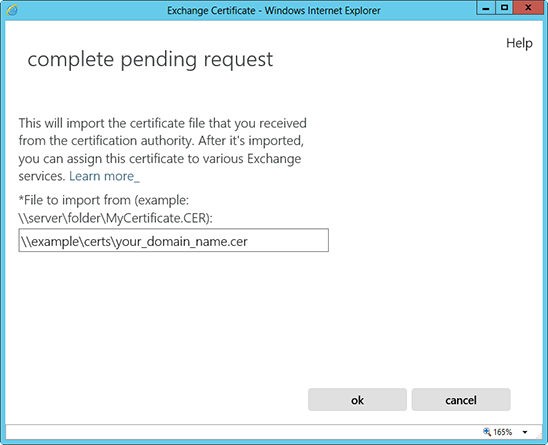
- It needs to locate your certificate file, so enter its network share path - once this is done, the certificate should be installed on the server
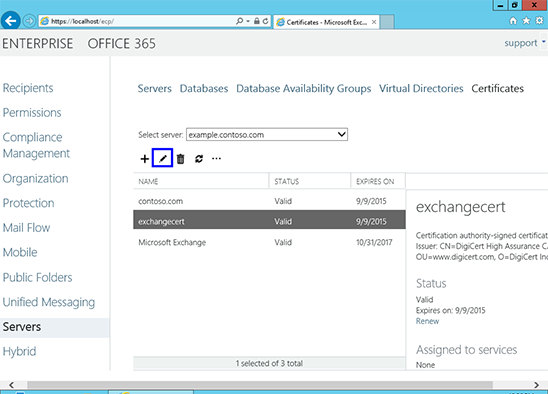
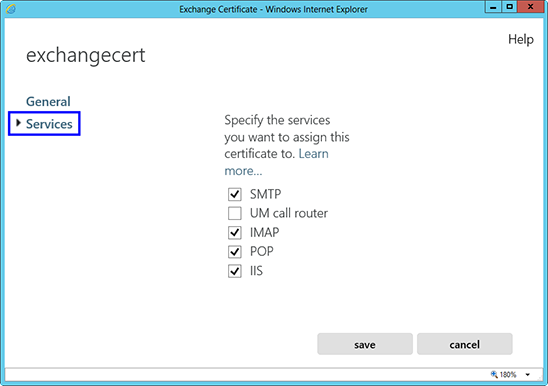
- To enable your certificate, return to the Exchange Admin Center and to the Certificates section. Highlight the relevant certificate and click Edit (the pencil)
- Click Services and then Specify the services you want to assign this certificate to, followed by Save
